The Mint Shop

The Mint Shop

Wednesday, 24 November 2010

Chocolate Winter warmer


I did promise to feed you with more chocolate. I think the weather requires it. It is so cold here and my feet are suffering - I do sound like an old granny when I say that I suffer from chilblains..many people don't even know what they are!

Probably I should increase my diet of chilly and spicy food. I should start planning a cycle of Asian dinners to R's joy. I will keep you posted on this.

In the mean time I am drinking litres and litres of hot tea (that ground floor loo has turned out to be useful after all! My mother-in-law was right....). So to go with my tea, I have clearly finished the Dutch bread, I have made a new cake combining my favourite Winter ingredients: chocolate, orange, cinnamon and pine nuts. Et voila! A chocolate with orange, cinnamon and pine nuts cake!

Winter Cake

200g dark chocolate
2 eggs
1 egg yolk (this means you use three eggs!)
100g sugar
100g flour
100g butter
1 tsp baking powder
1 tbsp cointreau (or whisky or Grand Marnier)
2 tsp cinnamon (or mixed spices)
zest of 1 orange
1 tbsp orange juice
3-4 tbsp pine nuts

1. Mix the flour with the baking powder and the cinnamon.

2. Melt baigne marie (in a glass bowl over a pan with steaming water) the chocolate chopped in pieces to speed up the process together with the butter. Mix well and set aside to cool down.

3. Whisk the eggs with the sugar and grate the orange zest in it. Add the liquor and mix well. Add the pine nuts and mix well. Add everything to the chocolate mix. Mix well to ensure everything is well incorporated.

4. Sift in the wet mixture the flour and mix well to make sure the flour is absorbed.

5. Pour the mix in a shallow or plump cake tin previously buttered and floured to avoid the cake sticks to the bottom or the sides of the tin.

6. Cook the cake in the oven at C180 for 30 minutes.

7. When it is cooked, leave it on a rack to cool down and then sprinkle either cacao or icing sugar (I would have preferred the icing sugar but I realised I had finished it when I did the carrot cake and couldn't be bothered to walk out in the cold...I think it looks pretty even in dark!).


P.S. Now that I have taken a photo of it, I can go and eat it!

Sunday, 21 November 2010

More ravioli


Pasta has endless worlds. You can come up with any new sauce and the same shape will acquire a completely different taste. And even if many don't believe it, each pasta shape does have its own combination. You couldn't possibly serve pesto with farfalle, or ragu' with linguine...simply wrong! (By the way did you know that at some point (a long time ago hopefully) Brits thought that pasta grew on tree?).

Yesterday I tried to impart this basic concept to the girls I am teaching Italian cooking to - who by the way are as expected all much taller than me...the only one who has my height is a 12 years' old girl...In any case I hope they took me seriously despite my lilliputian stature and believed in the Pasta Bible first commandment.

To show me that he has got the concept clear, R. gave me a present (I wonder what he had done...), a book called "The Geometry of Pasta". I will need to make my way through it - and you will surely know all about it.

So on Saturday I thought of having a variation of ravioli (see a few posts back) and fill them with pumpkin - how seasonal! The varieties of pumpkins that you can find are extraordinary - I must remember to take a picture tomorrow at the market.

Pumpkin Ravoli

For 4 people

300g pasta flour
3 eggs
2 tbsp olive oil
700g pumpkin
150g parmesan
100g bread crumbs
50 grounded almond
salt

1. Make the pasta. In a well of flour, crack the eggs and with a fork beat them slowly catching slowly the flour around it so that it gets incorporated. Add the olive oil so that it becomes smoother. At some point you won't be able to mix the flour using the fork, so just use your hand making a kneading movement. The result is a ball elastic and firm. Cover it in cling film and leave in the fridge to chill for half an hour.

2. Prepare the pumpkin. Cut it in piece removing the skin and the seeds/filaments. The pieces should be of around 4-6 cm wide and 5cm long (please don't take the tape measure though!). Leave them on a tray with a couple of tbsp of oil and some salt and roast in the oven at C200 for around 45 minutes.

3. When the pumpkin is soft, remove it and blend it to make a mash. Drain it in case there is excessive water. Add to this mash the bread crumbs, grated parmesan and grounded almonds. The filling has to be compact.

4. Remove the pasta from the fridge. Take part of it and make a patty. Pass it through the pasta machine using the widest slot and then passing it again (and flouring both the pasta and the slots) thinning it down using thinner and thinner slots. You can fold the pasta if gets too long and pass it again, it will make it even more elastic.

5. Create long strips (5cm wide) and using a tea spoon place a small amount of the pumpkin filling on the strip leaving 2 cm between each. Fold the side of the strip onto the other side to close the filling in it.

6. Using a finger, press the pasta in between the filling balls down and then cut both in between and on the sides. Seal each raviolo using the ridges of a fork.

7. Place the ravioli aside on a floured surface to avoid they stick together.

8. Cook the ravioli in boiling water (and a tbsp of a salt) for a couple of minutes. Apart melt in a pan 100g of butter with a few sage leaves. Drain the ravioli using a slotted spoon.

9. Dress the ravioli with the butter and sprinkle with more grated parmesan.


Friday, 19 November 2010

Dutch Spice Bread or Pan di Spezie


For some time I have seriously thought that nobody was really reading this blog. Not even those few bribed friends who under duress subscribed as followers. But then the marvellous doors of technology opened to me and I discovered that you can trace the traffic of readers and even their location! I was over ecstatic! Three in Chile!! Now, our friends Anna and Struan are in Chile which makes me think that the statistic could count them separately and then together, but that would mean that they have or use 3 different computers...well, better not nosing around and live in the illusion I have multiple readers!

A couple of our friends even started to say that I might become famous and turn the blog into a book like Julie Powell in Julia & Julia. Ha, ha, haaaaaaaaaaaaaaaaaa!!! Funny, very funny. But it's nice to be told that. Although the character of Julie is violently irritating. Never had a real egg?!?

However, I wonder why there are no men blogging about food when then they populate the famous kitchens - no time? Also we are literally inundated by blogs, some of them excellent. What makes a good blog?

Last night it was really cold in the house, and so I thought of warming myself up with the oven. Nothing that dramatic as gas suicidal... but simply baking a cake to have with my tea.

I had this wonderful and rich spice bread when I was in Amsterdam. I bought it in one of those cozy bakeries which only Northern countries seem to have. And Amsterdam has a special atmosphere of an old fashion village spiced up by ladies in windows and red glitzes. What I love of the place is the relaxed pace; flowers decorating bike handles, after office net tidying...


This bready cake is really easy to make and perfect for the Winter with all its aroma. You can decide the proportion of the spices in the way you want. My cousin who hates cinnamon will probably drop this ingredient all together.

Pan di Spezie (Spice bread; Pain d'epices; Gemberkoek)

250g flour
1 tbsp cinnamon
1 tsp cloves
1 tsp starred anice
1 tsp nutmeg
1 tsp grated ginger or powdered
zest of 1 orange (and candied orange if you have it)
1 egg
200ml milk
200ml honey
100g brown sugar
2 tsp baking powder

1. Warm in a pan the milk and melt in it the honey and sugar. Do not let it boil or it will form a gloopy effect once in the flour. Set aside to cool down.

2. Mix the flour with the baking powder, the spices and orange zest.

3. Beat the egg and add it to the milk making sure it doesn't turn into an omelette by stirring energetically.

4. Sift the flour into the milky mix until well incorporated. It will be quite dense.

5. Pour the mixture into a buttered and floured plump cake tin. Cook in the oven for 30 minutes at C180.


It is true that Amsterdam may give the impression of being very similar at every corner, but I can guarantee that each canal and bridge has its own character. Next time I'm there I will even be brave and hire a bike. Shouldn't be the risk of falling into the water hopefully....


P.S. This bread is very dangerous. Once you have it in the house, you just can't stop eating it...

Thursday, 18 November 2010

The real meat loaf or Polpettone


I know that you will think I have something against that poor woman of Nigella. The thing is that I don't think this time she's getting anything right, or at least very few (let's be positive!).

You might remember a few posts back on how to make Pesto alla Genovese (and a few family members scattered around Liguria can testify for me that it's THE authentic recipe). Nigella doesn't use pine nuts; the result is probably of some mushy basil leaves in oil. Pine nuts are essential.

Now, without even knowing that it was on Nigella's menu, my mother made meat loaf, also better known as Polpettone. My mother's recipe, without being vintage, is superb. No bread crumbs, as this would make it too dry, but parmisan to give it a mellow kick, and no chunky onions which I am sure will fill your mouth when you give a bite to it.

To confirm I am totally right, I will make them both and R. will be my judge (I am not competitive at all)...that the battle of polpettoni begins!

Polpettone di Mamma Rita (or Mamma Rita meat loaf)

600g lean (max 12% fat) beef mince
2 thick slices of white bread
100g parmisan
2 eggs (beaten)
parsley (two handfuls)
a quarter of garlic
2-3 hard boiled egg
1 egg
100ml olive oil
juice of 1 lemon

1. Prepare the mayonnaise first. Leave an egg out of the fridge for at least 1/2 hours before using it (this is tricky as I always think of making it too late! so half an hour might do providing your kitchen is a bit warmer than mine).

2. Crack the egg in a long and thin container, salt (1 tsp will do for now) and the juice of the lemon. Start beating it with blades (Moulinex blender will be ok) adding slowly the oil. Incorporate the oil and then add gradually more. You need to get a consistent but smooth sauce. Add salt if necessary. Set it aside in the fridge covering it with cling film to avoid it make a thick layer on the surface.

3. Soak the bread in a bowl with enough milk to cover it. Just leave it in the milk for a minute as it only needs to soak and not disintegrate... Squeeze the milk and tear it into small pieces.

4. In a large bowl put the mince, add 1 tsp of salt (not too much as the parmisan will add the flavour) and mix well. Add the soaked bread and mix well.

5. Grate the parmisan and add it to the meat. Add also the finely chopped parsley and the quarter garlic very finely chopped (if you have it, you can replace parsley and garlic with salsa verde).

6. Add the egg and mix well. Make the loaf into a flat square. Place the boiled eggs on half of this square and fold the other half to close it well.

7. Cooking: two options. 1. Boiled in a cloth (the cloth will release some juice which you can use to pour onto the meat and make it more moisture) in boiling water for 30 minutes; 2. Roasted in the oven wrapped in silver foil for 40 minutes at C220 (after the first 30 minutes open the foil on the top so that the surface of the loaf golden up a bit without burning).

8. Serve either options above with the prepared mayonnaise.

I must recognise that the addition of bacon while cooking in the oven could be good (Nigella gets something right from time to time), so do try it and let me know!

This is a really easy recipe which can be used both for an informal meal or for a buffet and a real warmer. You can embellish the meat loaf with raisin and pine nuts (the first ones soaked in sherry for 10 minutes, then squeezed and added to the mince, the second ones tossed in a pan and added to mince) as well as some sausage meat (reducing the mince quantity, e.g. 450g mince meat, 150g sausage).

Polpettone is a real childhood madeleine for me. We have it in Autumn when days start getting shorter and chilly. The photos below are from our garden.


Wednesday, 17 November 2010

More chocolate


I did warn you that more recipes involving chocolate would have followed. I hope I will make some of my followers happy!

Last weekend I was in Siena at my parents' and every time I'm there I feel that I need to cook something for them. It might be as a way of thanking my mother and be in charge of the kitchen for a tiny bit after she slaves behind the cookers for days; or it might be to finish up some of the ingredients that lay around the cupboards for months (if not even years!) until complete putrification....my father and I have often suspected that my mother was running for the Nobel prize in medicine of moulds.

So before the Easter egg chocolate started acquiring that suspicious grey colour I decided to go through a wonderful book on chocolate that my mother has on her "cooking library" which must contain more than 150,000 recipes! And made dark chocolate tartlets. On Sunday the weather looked rather dodgy and inspired a real oven session instead.

The day before though the sun was shining and the temperature scarily warm. So I suggested to go and inspect the castle where my sister is planning to organise her wedding. I thought that was my duty of older sister....the photos below were sneakily taken in the garden.


In the garden there was an amazing tree that the owner claimed her son normally climb until the very top - that is something that needs to be tested...maybe not during the wedding though!


But back to our chocolate treat. The recipe is quite simple. What you need to make sure you do is to leave the base dough in the fridge for at least 30 minutes or it will be all floppy and difficult to arrange on the moulds.

Dark Chocolate Tartlets

Makes 6 medium tartlets

200g flour
100g cocoa powder
3 eggs
200g butter
100g caster sugar

200g dark chocolate
20dl cream
10 dl milk
1 egg

1. Make the base first. Mix the butter with the egg and whisk well. Mix the cocoa to the flour and sift them to the wet mixture.

2. Work quickly the paste and form a ball. Cover it with foil and leave in the fridge for at least 30 minutes (up to 2 hours).

3. Prepare the cream. Melt the chocolate at baigne-marie and then add the cream/milk and the beaten egg. Whisk well to ensure everything gets incorporated.

4. After the cooling time in the fridge, remove the base and use it to cover the bottom and sides of 6 tartlet moulds which you will have greased and floured before to avoid the pasty sticks to the bottom.

5. Cover the pasty with silver foil and fill them with dry beans so that the pasty won't raise while it is cooking. Don't pour the beans without the foil as I did once!

6. Cook them in the oven for 8 minutes. Once they are cooked, remove the beans and foils and set aside to cool down for a couple of minutes.

7. Fill the bases with the chocolate cream (if it has formed a foil on the surface, just whisk the cream again) almost up to the top leaving half a cm.

8. Cook the tartlets in the oven at C180 for 10 minutes.

9. Remove them from the oven and leave them to cool on a rack for at least 1 hour. Sprinkle before serving them with icing sugar.

Monday, 15 November 2010

Wild Boar in spicy chocolate sauce


I'm sure that many of you will think I've gone nuts. Wild Boar and chocolate...?!? I know, it does sound a bit odd. However, true chocolate lovers (and conoisseurs) will understand me when I say that the combination genuinely works and will realise that it's a fantastic match. And it's a dish to impress your guests!

Not sure whether this is my chocolate period (il tempo della cioccolata) considering that I have never thought of myself as a chocolate gourmand. Not like my friend A. who could buy a bag of Brazil nuts coated in chocolate and devoured them in less than 5 minutes...not sure how she does!

I must recognise though that chocolate, if dark though (and not that one with nuts, raisins, milk as Brits are used to), has unexpected wonders. A. will be interested in this part...

lowers blood pressure
lowers LDL cholesterol
stimulates endorphins giving a feeling of pleasure
anti depressant as it contains serotonin
stimulates attention being rich in theobromine

I doubt you can still resist to chocolate now...more recipes will follow! For the moment I give you this one that comes from the Medici Family in Renaissance Florence. So I thought of adding a few snaps I took in Florence (where I was hunting for a leather jacket).


If you go to Florence I would make sure of not missing to have aperitif at Finisterrae in via dei Pepi, dinner at Zaza' in via della Stufa (on the other side of the Arno), and a snack with panino & lardo di colonnata (an indescribable cold meat made of pork fat cured with salt, pepper and herbs out of this world) at I Fratellini in via dei Cimatori just off via del Corso. And of course tea and chocolate (to take away) at Cafe' Rivoire in piazza della Signoria!

Below is the recipe. Please don't be freaked out by the long list of ingredients, they are all easily available and reasonably cheap!

For 4 people

1kg wild boar (or venison or beef) cut into 5cm cubes
90g dark chocolate
0.6dl olive oil
1 medium onion
1 big carrot
1 celery stalk
2 garlic cloves
2 tbsp chopped parsley
2 bay leaves
1/2 tsp powdered cinnamon
1/2 tsp nutmeg
1,8 dl red wine
6dl white wine vinegar
2.5 dl meat stock
0.6dl grappa (or schnapp)
4 tbsp walnuts
2 tbsp raisins
3 tbsp pine nuts
3 tbsp candied lemon rind
2 tbsp sugar
salt and black pepper

1. Heat the oil in a shallow but large pan. Chop the onion, carrot, celery, onion and parsley to the oil and cook for 10 minutes tossing often until they are soft and lightly pan fried.

2. Add the meat and cook it quickly for a few minutes. Add the salt, the spices and bay leaves. Pour the wine and cook for 5 minutes. The wine will evaporate. Add the vinegar and let it evaporate too.

3. Add the stock and cover to let it simmer for 45 minutes or until the meat is tender. Add more stock if you think that the sauce is too thick or is sticking to the bottom of the pan.

4. Melt at baigne-marie the chocolate. Add to it the grappa, walnuts, raisins, pine nuts and candied lemon rinds, and the sugar. Mix well and remove from the heat.

5. Remove the meat from the pan and place it in a plate. Remove the excessive fat from the pan.

6. Add to the chocolate a few tbsp of the cooking broth and add it to the meat which you will have placed back again in the pan.

7. Simmer everything again for a further 3minutes.

You can serve it with roasted potatoes (without any herbs) or just a plain mixed salad. My mother would probably serve it with polenta as she loves it and comforts her in winter....I frankly cannot stand it so I won't...


Sunday, 7 November 2010

Sunday whimsies


Sometimes the best recipes are the result of mistakes. I might not got that far to claim that what we made tonight amounted to great food. But it was pretty nice. And overall quite easy, even for those who don't think they like spending too much time behind the cooker.

The original ideas came out of the aftermaths of our walk in the country side. Inevitably around this time of year you will hear me saying "why don't we go for a walk where there are trees"?

And our search brought us to Wandlebury. I am sure most of you know my obsession for the Autumnal colours. And I will never get bored enough to my ooohhs and ahhhhas.


So once back home I thought of having a menu which could go nicely with the atmosphere. Pumpkin ravioli seemed appropriate (with the plus of giving me the chance to practice once more before the next cooking class I'm going to give).

The recipe requires that you peel and cut the pumpkin into small pieces. However, our pieces were far too small and thin. The result was that they cooked too quickly and turned into crispy layers of vegetable. But they were actually rather nice with a sprinkle of salt and coarsely grated parmisan on top, a healthy snack.

Pumpkin crisps

Makes 25

250g pumpkin
1 tbsp olive oil
1 tbsp grated almond

Peel and cut the pumpkin into small and thin strips. Distribute on a greased tray and cover and toss with the oil.

Cook in the oven for 40minutes until crispy. Sprinkle with salt and almond. Before serving sprinkle some roughly grated parmisan.

With a glass of Sauvignon Blanc, they're perfect as little nibbles.

Despite our detour, we decided to carry on with the menu. As the ravioli had lost their main ingredients, i.e. the pumpkin, I thought they could have worked equally well with porcini. I would strongly advise that you use chestnut mushrooms as they taste a lot better than normal mushrooms and probably closer to porcini. You can increase the flavour with dried porcini (the same tricks you would use for the risotto, see two posts ago).

Porcini ravioli

For 2 people

200g flour
1 egg
1 tbsp olive oil
150g mushrooms
100g dried porcini
100g grated parmisan
1 garlic clove
1 handful of parsley

1. First make the pasta. Make a well with the flour. Crack the egg in it and using a fork beat the egg catching some of the flour at the time. Pour the oil in it and continue whisking to incorporate all the flour. Finish the mix by using your hands. If it is too wet, add some flour and knead for a couple of minutes. Make a ball and wrap in cling film.Leave in the fridge for at least 20 minutes.

2. Make the filling. Soak the dried porcini in warm water and cover the bowl with a lid to ensure the water the porcini are soaking in remains in the bowl.

3. Cook the fresh mushrooms in a pan with a tbsp of oil and the garlic (only chopped into half so that once it is become brown it can be removed). Once they are almost cooked, add the parsley.

4. Squeeze the porcini from their water and add them to the fresh mushrooms.

5. I added also some strends of saffron to be fancy, but if you don't have them (and usually people don't unless they've recently been to Syria or a similar place and a friend of yours bought 3 boxes for the price of half of what you get here!).

6. Skipping most likely step 5, blend the mushroom in a mixer. Add the parmisan. The mix needs to be quite thick. Sprinkle salt and pepper to taste.

7. Remove the pasta from the fridge and slowly pass it through the pasta machine making sure that you go through each number of thickness to avoid holes (from larger to thinner).

8. Once you have made long strips, place a small tsp of mushroom mix on the pasta strip making sure you leave some space in between.

9. Fold the half (horizontally speaking) of the pasta onto the other half so that filling gets closed. With a finger, create the ravioli and then cut them using a knife or a ravioli wheel.

10. Finish each raviolo making sure that each side is properly sealed as otherwise the filling will come out while they are cooking.

11. Cook them in salted boiling water for 5-6 minutes and then serve them with melted butter and sage with a generous sprinkle of parmisan.

We made a few tortellini as well but I think it is a bit too difficult to explain without showing you in person. But let's try....Essentially, you make a series of circles and in each circle, in the middle, you put a small amount of the filling. Fold the circle into half to make a half moon and seal the sides. Then stick together the edges of the moon and bend slightly the little head left. Let me know if you've tried following this explanation. IF they work, then I'm genius!

More snaps from our inspiring Autumnal walk...


Thursday, 4 November 2010

Kim chee - or Korean cabbage


Now, I have this friend who one never knows where he is and tends to disappear in the air like that. Mystery. But when he is around, he's lovely. One of those that you know you can wake up at 4am to come and rescue you. And one of those with whom conversation seems was just put on hold and can be picked up as you have seen him ten minutes before. You know what I mean.

Last week it was his birthday and, I must admit, thanks to Facebook, I remembered to ring him and leave a cheerful message on his answering machine (quite typical). Surprisingly I got called back only two days later.

As he was just back from Korea, he thought it was a nice idea to prepare Korean food. The one you eat in the country side, what my friend calls peasant food. What I had when I stopped in Seoul had probably the same social extraction. Tasty, but quite simple. The ingredients were: Roman lettuce (I'm sure they use a slightly more local one), chopped chillies, garlic, rice cooked with some soy sauce, meat or vegetables coated in chilly and lightly fried, and the secret ingredient: kimchee.

We could talk about kim chee for hours. It's a bit like cod in Portugal or sheep cheese in Italy. The variants are endless. And (according to the locals) they all taste different.
So, kim chee. It is Chinese cabbage which gets fermented in enormous quantities with water, vinegar, ginger, scallion, pepper and sugar. Koreans keep it in barrels for months so that you have 9 months kimchee, 6 months kimchee, 3 months kimchee etc. A bit like whisky or wine.


To me it probably tastes a bit like German krauti with a kick. It is actually not bad. Well last night we had it with all the ingredients listed above. I must admit that it was a bit of a messy business. And considering that my friend forgot to give us napkins, I was glad that I knew I needed to wash my jeans the day after. (Uh, this reminds me I need to put them in the washing machine!).

What you do is: take a leave of lettuce, put a spoon of rice in the middle of it, add the kimchee, a couple of chopped garlic pieces and chillies, and a few bits of vegetables dipped in a yummy sauce. Then, if you can, you make a little bundle and yum it up. As I was greedy and tried to stuff it as much as possible, the gentle bundle fell apart dropping rice and cabbage everywhere. And as I wasn't allowed to use my chop stick as it would have been considered impolite (because it is used to fish from the communal bowls) I sadly left behind a lot of ingredients....sigh!

Apart from the soup, we had everything else that is on the table in this photo I took in a village near Seoul. There I was also gifted with a big slab of steamed liver (yak!)


The magic sauce. It can be used as a healthy starter with crudités. All you need is:

100ml soy sauce
2 tbsp sesame seeds oil
2 garlic cloves finely chopped
half a red chilly
juice of a quarter of a lemon

We dipped (and dipped, and dipped...I couldn't stop myself) leaves of lettuce. But you can use strips of pepper, slices of mushrooms, potatoes.... I'm sure that everyone knew it years ago, but I never did. And it can be used to marinate fish as well and then lightly pan fry it.
A sauce for all seasons!

Like Japanese, Korean (at least South Koreans) love to display their food in very pretty arrangements. Amazing the attention they give to all the little details. The food in the shop windows is clearly made of plastic (it would go off quite quickly I guess, in which case not very pretty anymore!).


I have posted a few photos I took when I was there. It was freezing cold and it had just snowed. I went from the C32 with 80% humidity of Bali to the 2C with snow in Korea....body shock! The details of the temples (very few left in the middle of the city) were fantastic. As well as the prayers left hanging outside of the school with balloons of different colours.


The fish bring luck because it is brings wealth and puts out fires!


I love the mini Buddha in the hole of the tree. Buddhism is the main religion there but Christianity and Confucianism also co-exist.

Tuesday, 2 November 2010

Autumnal risotto


One of the things I don't seem to stop marvelling at are the colours we get at this time of the year. I probably sound like a broken record but I cannot help myself from crying out "look at that, honestly, isn't it amazing? That is why I find really sad, almost disturbing, that shops have such little imagination that they can only think of Christmas decorations. What about all these fantastic leaves, pumpkins (of all shapes and colours), mushrooms, berries, etc, etc?


Cambridge in October blows you away. The colours are blustering. Days are still mild with not much rain. And there are not as many tourists around as in the Summer - and therefore the entrance to all the colleges is free at any time, and not just after 5pm!


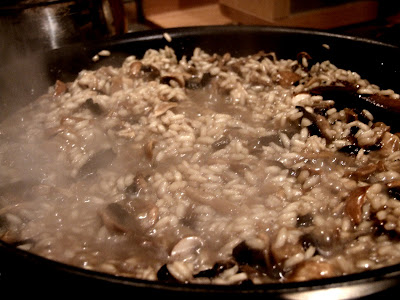
So, to continue with the seasonal theme, last night I made porcini risotto. This is a dish which I would suggest if you have dinner parties and want to avoid being flustered around the kitchen dealing with multiple moving ingredients at the last minute. The joy of a risotto is that you can start preparing it and cooking it beforehand, and finishing it just before being served. If you are using good risotto rice like Arborio or Carnaroli rice, you won't risk to get a mushy pap.

Ideally you should use fresh porcini as well as dried porcini. But I know that this would be impossible, so the best types of mushrooms you can replace them with are chestnut mushrooms. They have a lovely nutty and earthy taste. Also, if you can find it in a good Italian deli, another secret ingredient is porcini stock. Added to the water, it adds a lot of flavour.

Porcini Risotto

For 4 people

400g Arborio or Carnaroli rice;
300g fresh mushrooms;
100g dried porcini;
1l hot water;
2 garlic cloves;
1 porcini stock (or vegetable);
1 glass of red wine;
1 handful of parsley;
100g parmisan;
a knob of butter;
2 tbsp olive oil

1. Peel and chop into half the garlic cloves. In a pan golden up the garlic with the oil. When the oil is warm and the garlic has started getting colour, add the knob of butter and let it melt slowly.

2. Place the dried mushrooms in a bowl with warm water and cover. The mushrooms will need to soak up some of the water.

3. Add the rice to the pan and toss well to ensure that all grains get coated with the butter/oil. Continue until the rice looks golden.

4. Make the stock with hot water. Add some of this water to the rice (it will fizzle a bit). Add some of the fresh mushrooms and stir well.

5. Add to the rice the water where the dried porcini had been soaking. Chop in small pieces the dried porcini and add them to the rice.

6. Continue adding the stock and porcini water to the rice. It must never be dried and the grains must cook slowly. The rice will acquire a lush glossiness. Add salt (probably 2 tsp) to taste.


7. Add the rest of the fresh mushrooms. When the rice is almost cooked, add the glass of wine and let it evaporate.

8. When the rice is practically cooked, add the chopped parsley.

9. Sprinkle the grated parmisan and mix well. Serve with a few parsley leaves and more parmisan on top.


Monday, 1 November 2010

Chocolate and Rabbits for Halloween


I forgot to tell you that I am part of a cooking group (http://muchpru.homelinux.org/cooking/?page_id=9). There are 5 of us from different nationalities (English, French, Italian and Japanese) and the idea is to meet from time to time and teach one or two recipes from our country. As my cousin Giulia was visiting for the weekend, and Halloween was around the corner, I thought of bringing a slice of Tuscany to Cambridge to celebrate Autumn and All Saints.

Tuscan food is quite simple and earthy. Nothing too fancy. Just genuine, frank flavours with some Medieval touches. Most of it was developed at the court of Caterina dei Medici who brought with her some of her favourites. I am sure nobody knows that the original recipes for crepes and canard a' l'orange were in reality introduced to France from Florence, and I am not making it up! It is based on historical records - but I am sure that no French person would believe this story. Tant pis!

So rabbit with black olives, rosemary and garlic is a very traditional dish from Siena. But please don't even start looking at this recipe if you are squeamish even in the slightest! I have warned you...so don't blame me for shaky legs or sudden sickness!

The meat was locally supplied from the Mill Road butcher - probably one of the best in Cambridge (this is once more in support of our Romsey Town Heaven!).


I would recommend that you ask the butcher to chop the rabbit and clean it as much as possible before you start cooking it. Also make sure you leave it in a bowl with running tap water for at least an hour (I know this sounds like an awful waste of resources but believe me if you don't you will feel like gone back to nature, a bit too much in fact!). I would also suggest that you are away from the kitchen and cannot hear the noise as it does turn into a real Chinese torture after only 15 minutes....

I might not have sold this rabbit very well. True. But it can taste divine - Alison can confirm (she had three servings!).

Rabbit with olives, rosemary, and garlic ("Coniglio alla Toscana")

a medium rabbit (approx 1kg);
150g black dried olives;
2 long sprigs of fresh rosemary;
3-4 garlic cloves;
half a glass of red wine;
4-5 tbsp olive oil;
600g potatoes

1. Pat dry the rabbits pieces (warning! this caused dizziness and sickness in one of our cooking members...who didn't faint though...phew!) with kitchen paper (rather than a towel as the smell that leaves is hard to remove despite two washings!).

2. In a large medium deep frying pan (a casserole would also do), heat the oil with the garlic and rosemary until the garlic is slightly brown.

3. Add the rabbit pieces cooking quickly on each side. Add the wine and let it evaporate.

4. Reduce the heat and add the olives. Cover and simmer for at least 25 minutes. The bottom of the pan will have a sticky layer of fat and olives which you can just scratch gently and add to the rest of the dish.

5. Separately cook the potatoes chopped in a 2-3 cm pieces in abundant salted water. Once they are half way cooking, drain them and add them to the rabbit. Stir well to ensure the rabbit oil covers the potatoes.

6. Serve hot with some mixed salad on the side.

The photo below was taken before the potatoes (and before the camera died).

I know that you are expecting the chocolate recipe too. I hope you have managed to read till now - and haven't been put off by the cute rabbit....

This chocolate cake is heaven. Not only because does it taste fantastic but also because it doesn't have many calories. So double good!

Dolce al cioccolato fondente (Fondant chocolate cake)

3oog dark chocolate (Sainsbury's basic will do perfectly well);
4 eggs;
4 tbsp sugar;
300g butter;
2 tbsp flour;
1 espresso cup

1. Pre-heat the oven at 180C. Melt the chocolate in a bowl on a boiling pan. Add the butter and incorporate well. Add the espresso and mix well. Let it cool.

2. Separate the eggs. Beat the yolks with the sugar and add them to the chocolate mix. Beat the egg whites until firm.

3. Add the flour using a sift to the chocolate mix. Mix well to ensure there are no lumps. If there are use a whisker and they will disappear.

4. Fold the beaten egg whites to the chocolate mix (with a clock-wise movement from down to up) with a metal spoon to avoid the air created in the whites doesn't disappear.

5. Grease and flour well a 20cm baking tray. Pour the mixture into the tray and cook in the oven for 30 minutes at C180.

The photo was taken only a couple of minutes after the cake was brought to the table. So you have an idea of how good it was!!